
How to install the sliding window?
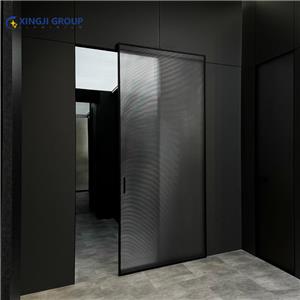
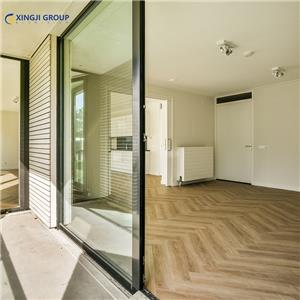
Transforming living spaces with light, air, and seamless access starts with flawlessly installed sliding windows. As a premier sliding window company specializing in high-performance aluminum systems, Curma emphasizes that expert installation is paramount to unlocking the full potential of our products. Whether you're envisioning a serene sliding window in bedroom retreat, expansive side sliding windows for panoramic views, or the unique functionality of a top hung sliding window, this guide outlines core principles. Remember, while this knowledge empowers, professional sliding window fitting by certified technicians guarantees optimal performance and warranty adherence.
I. Strategic Planning: Tailoring Installation to Your Window Type
Every successful installation begins with meticulous planning, especially when considering specific window styles like a sliding window in bedroom or large side sliding windows.
Window-Specific Measurement Protocols: Precision is non-negotiable. For a standard sliding window in bedroom, measure the rough opening width/height at multiple points. Side sliding windows, often wider, require extra attention to track alignment and structural support points. A unique top hung sliding window demands precise head clearance for its pivoting action. Always reference the specific product datasheet from your sliding window company for tolerances and requirements. Never assume old opening dimensions suffice.
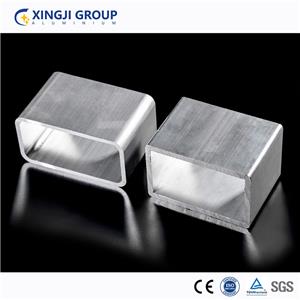
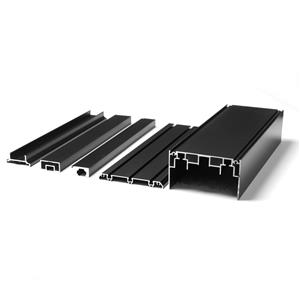
Tool & Material Readiness: Beyond standard tools (level, drill, shims), consider window specifics. Large side sliding windows may need extra support during handling. A top hung sliding window requires specific fasteners for its top-hung mechanism. Ensure all components provided by your sliding window company are present and undamaged. High-quality, non-corrosive sealants compatible with aluminum are crucial.
Site Assessment & Safety: Evaluate the opening's condition rigorously. Bedroom installations (sliding window in bedroom) often involve careful interior finish protection. For side sliding windows spanning significant widths, verify header integrity. Ensure safe access and handling – larger units demand multiple personnel. Partnering with a professional sliding window company mitigates these risks entirely.
Understanding Your System: Study the sliding window fitting instructions provided by your sliding window company. Note drainage weeps, roller adjustment points, and specific flashing requirements. Differences exist between a standard slider, a top hung sliding window, and complex side sliding windows configurations. Knowing these before installation prevents errors.

II. Precision Execution: Installing for Smooth Operation & Longevity
The physical installation phase demands unwavering attention to detail, particularly for specialized units like the top hung sliding window.
Dry Fit & Initial Support: Carefully position the window unit within the rough opening. For a sliding window in bedroom, ensure easy operational clearance. With side sliding windows, verify the track is perfectly straight across its length. A top hung sliding window must sit squarely to allow unimpeded top-hung movement. Use temporary supports and shims generously.
Achieving Critical Alignment: This is the cornerstone of smooth operation and prevents premature wear on sliding window fitting components. Use a long level (4-ft minimum):
Sill Must Be Perfectly Level: Critical for all types, especially side sliding windows to prevent sash drift. Shim meticulously under the sill at mounting points.
Jambs Must Be Perfectly Plumb: Essential for the vertical track alignment in standard sliders and side sliding windows, and for the smooth pivot of a top hung sliding window. Shim between jambs and rough framing.
Frame Must Be Square: Measure diagonals corner-to-corner; adjust shimming until equal. Never force the frame – proper shimming achieves alignment without distortion. Recheck constantly during fastening.
Securing the Frame: Following the sliding window company's guidelines, drill pilot holes and fasten through the designated flanges or channels into solid framing using provided corrosion-resistant screws. Tighten progressively and evenly, constantly rechecking level, plumb, and square. Pay special attention to the head of a top hung sliding window where the pivot mechanism bears significant load. Secure all specified points around the perimeter.
III. Sealing the System: Weatherproofing & Final Integration
Proper sealing is what separates a good installation from a truly durable, high-performance sliding window fitting completed by a reputable sliding window company.
Precision Insulation Application: Fill the perimeter gap between frame and rough opening. Use minimal-expanding, window-specific foam for gaps under 1/2 inch. Apply conservatively to prevent frame distortion – a common pitfall in DIY sliding window fitting. For larger gaps, use backer rod topped with foam. Crucially, never block internal drainage weeps within the frame, a critical feature of quality aluminum systems from any reputable sliding window company.
Expert Caulking Technique: Apply a continuous, even bead of premium, UV-resistant, elastomeric exterior sealant where the window's exterior trim/flange meets the siding. Smooth the bead. Critical Rule: Never seal the bottom of the sill or weep holes! These are essential for draining moisture. Interior caulking around trim is mainly aesthetic/air-sealing. Professional sliding window fitting ensures correct bead size and placement.
Final Verification & Trim: Install interior trim, ensuring it doesn't hinder operation. Conduct a final comprehensive check: flawless sash movement (slide or pivot), secure locking, visual inspection of all seals and flashing, and verification that weeps are clear. This is the hallmark of quality work from a trusted sliding window company.
